
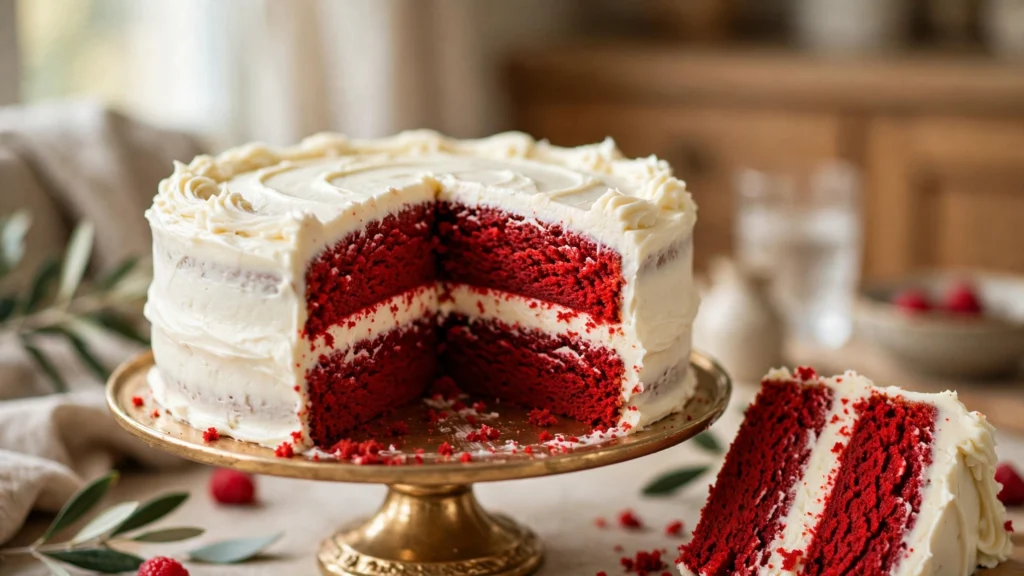

Red Velvet Cake is known for its deep red color, subtle cocoa flavor, and soft, tender crumb, all finished off with a tangy cream cheese frosting that balances the sweetness perfectly. It’s a cake that looks dramatic and celebratory, but the batter itself comes together with simple pantry staples and no special baking skills required.
Making it from scratch means you get to use real buttermilk, good cocoa powder, and a properly balanced frosting instead of the overly sweet, artificial versions found in bakery cakes. It also means you control exactly how much color and sweetness goes in, and you can easily adjust it for a smaller or larger crowd.
✅ Quick Tip: Read through the full recipe before you start. Since this cake bakes in two layers and needs a fully cooled base before frosting, having your pans, buttermilk, and frosting ingredients ready ahead of time keeps the whole process smooth.
Classic Red Velvet Cake with Cream Cheese Frosting
Description
A two-layer red velvet cake with a soft, tender crumb and a hint of cocoa, finished with a rich, tangy cream cheese frosting. Made with real buttermilk and simple pantry ingredients, this classic cake is a reliable favorite for birthdays, holidays, or any occasion worth celebrating.
Ingredients
Cake
Cream Cheese Frosting
Instructions
-
Preheat the oven to 175°C (350°F). Grease two 9-inch round cake pans and line the bottoms with parchment paper.
-
Mix the dry ingredients. In a large bowl, whisk together the flour, sugar, cocoa powder, baking soda, and salt.
-
Mix the wet ingredients. In a separate bowl, whisk together the vegetable oil, buttermilk, eggs, red food coloring, vanilla extract, and vinegar until well combined.
-
Combine. Pour the wet ingredients into the dry ingredients and whisk just until smooth, with no lumps of flour remaining. Avoid overmixing.
-
Divide and bake. Split the batter evenly between the two prepared pans. Bake for 25–30 minutes, until a toothpick inserted into the center comes out clean.
-
Cool the layers. Let the cakes cool in the pans for 10 minutes, then turn them out onto a wire rack to cool completely, about 1 hour, before frosting.
-
Make the frosting. Beat the softened cream cheese and butter together until smooth and creamy. Gradually add the powdered sugar, beating on low speed until fully incorporated, then mix in the vanilla extract and beat until light and fluffy.
-
Assemble. Place one cake layer on a serving plate and spread a layer of frosting evenly over the top. Place the second layer on top and frost the top and sides of the whole cake.
-
Chill briefly, then serve. Refrigerate the frosted cake for 20–30 minutes to set the frosting before slicing.
Nutrition Facts
Servings 12
- Amount Per Serving
- Calories 480kcal
- % Daily Value *
- Total Fat 27g42%
- Saturated Fat 10g50%
- Total Carbohydrate 55g19%
- Sugars 42g
- Protein 5g10%
- Vitamin E 8 IU
- Vitamin K 5 mcg
* Percent Daily Values are based on a 2,000 calorie diet. Your daily value may be higher or lower depending on your calorie needs.
Note
You can bake this batter as cupcakes instead of a layer cake it makes about 24 cupcakes at the same oven temperature, baked for 18–20 minutes. If you prefer a less tangy frosting, swap half the cream cheese for extra butter. For a natural alternative to artificial food coloring, beet powder can be used, though the color will be slightly less vibrant.