
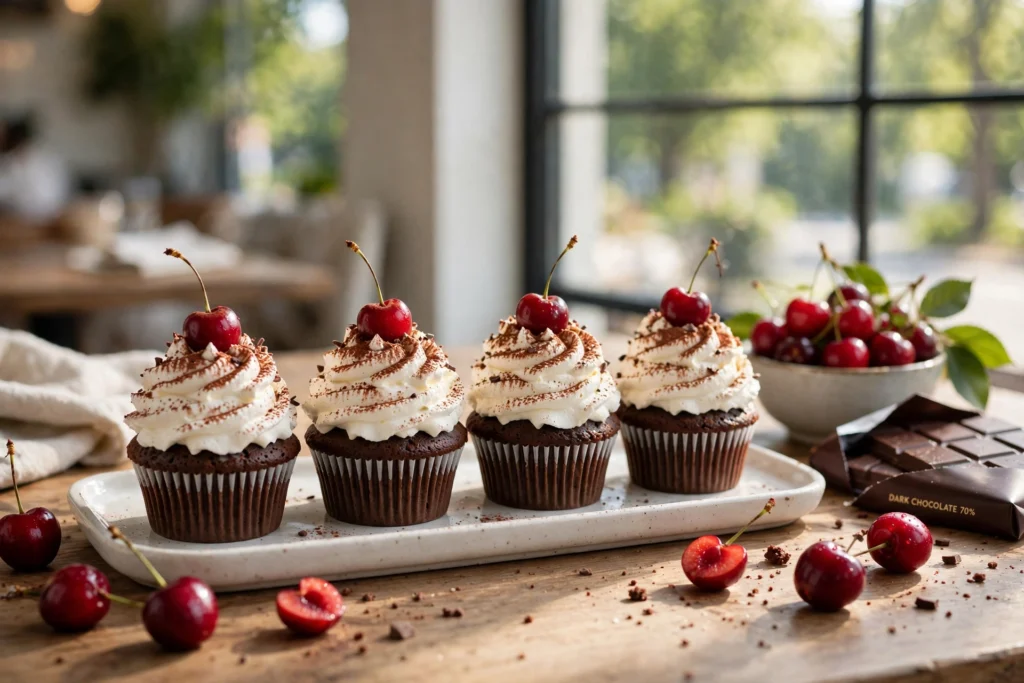
I made these Black Forest cupcakes for my daughter’s ninth birthday, since she’d asked for “the cherry chocolate ones” from a bakery we’d visited that summer. My first attempt came out a bit dry, because I’d left them in for closer to 25 minutes instead of checking at 18, and I didn’t core out enough space for the cherry filling, so most of it just slid off the top. The second time around, I pulled them at 20 minutes and used a proper cupcake corer, and they came out with a soft, moist crumb and that rich chocolate smell filling the kitchen while they baked. They have a rich cocoa cupcake base, a spoonful of homemade cherry filling tucked right in the middle, and a big swirl of stabilized whipped cream piped on top. It’s a cupcake version of the classic German Black Forest cake, and it comes together in fewer steps than you’d think once you break it into stages. You don’t need any fancy skills, just a bit of patience while the layers cool.

Black Forest Cupcakes
Description
These cupcakes bring together three simple parts: a moist chocolate cupcake, a sweet-tart cherry filling with a hint of almond, and a cloud of lightly sweetened, stabilized whipped cream on top. Each bite has that classic Black Forest combo of deep cocoa flavor and juicy cherries, without needing to build and stack a full cake. They're great for birthdays, holidays, or just a weekend baking project with the kids helping to spoon in the filling.
Ingredients
For 12 Cupcakes
Cherry Filling
Stabilized Whipped Cream
To Top
Instructions
-
Make the Cherry Filling
In a medium saucepan, stir the cornstarch into the water (or cherry juice) until it's completely smooth with no lumps — this is called a slurry, and mixing it before adding heat is what keeps the filling from getting clumpy later. Add the cherries and sugar and set the pan over medium heat. Cook, stirring often, until the cherries soften and the mixture turns thick and glossy, like a thin jam that coats the back of a spoon when you dip it in — this usually takes 7–10 minutes once it comes to a simmer. Don't worry about hitting an exact time; just keep cooking and stirring until it looks thick like that. Take the pan off the heat and stir in the vanilla and almond extract, if using. Let the filling cool to room temperature before you fill the cupcakes — you can leave it on the counter, or cool it faster in the fridge if you're short on time. This can also be made up to 3 days ahead and kept in the fridge in a sealed container.
-
Mix the Dry Ingredients
Preheat your oven to 180°C / 350°F and line a 12-cup muffin pan with paper liners. In a large bowl, whisk together the flour, cocoa powder, espresso powder, baking powder, and salt until there are no cocoa lumps left.
-
Mix the Wet Ingredients and Combine
Make sure your melted butter has cooled to just warm, not hot, so it doesn't start cooking the eggs when you whisk them together. In a separate bowl, whisk the melted butter, eggs, sugar, and vanilla together until smooth. Add about half of the flour mixture and stir gently, then add the milk and the rest of the flour mixture, mixing just until combined. Don't overmix the batter or the cupcakes will turn out tough and dry instead of soft — I learned this the hard way after over-stirring my first batch while I was on the phone.
-
Bake
Divide the batter evenly between the liners, filling each about halfway (roughly 1/4 cup / 60ml per cupcake, but let "halfway" be your guide since liners vary). Bake for 18–22 minutes, until the tops spring back lightly when you press them. A few moist crumbs on a toothpick inserted in the center are ideal; a completely clean toothpick usually means the cupcakes are fully baked too, but they may come out slightly less moist. Let the cupcakes cool in the pan for 5 minutes, then move them to a wire rack to cool completely before filling — cupcakes that are even a little warm will melt the whipped cream.
-
Make the Whipped Cream
Add the cold water to a small microwave-safe bowl and sprinkle the gelatin over the top. Let it sit for 3–5 minutes to bloom, then microwave in short 5-second bursts, checking each time, until it's fully dissolved and clear (this can take anywhere from 5–15 seconds depending on your microwave). Set it aside to cool until barely warm but still fluid and pourable. In a stand mixer or with a hand mixer, whip the heavy cream, powdered sugar, and vanilla until soft peaks form. With the mixer on low, slowly pour in the gelatin mixture, then turn the speed back up to medium and whip until stiff peaks form. Watch it closely near the end — overwhipped cream turns grainy and separates fast.
-
Assemble
Use a cupcake corer to remove a small section from the center of each cooled cupcake (no corer? A small paring knife works too — cut a circle down into the center without going all the way through, then lift it out with a spoon). Spoon in about a tablespoon of the cooled cherry filling. Pipe or spoon the whipped cream generously on top — a piping bag with a large round tip gives you the classic swirl, but a zip-top bag with the corner snipped off works just as well if you don't have one. Finish with a fresh cherry and a scattering of dark chocolate shavings. Serve right away, or chill until ready to serve.
Nutrition Facts
Servings 12
- Amount Per Serving
- Calories 416kcal
- % Daily Value *
- Total Fat 24g37%
- Saturated Fat 15g75%
- Cholesterol 98mg33%
- Sodium 190mg8%
- Total Carbohydrate 45g15%
- Dietary Fiber 2g8%
- Sugars 30g
- Protein 5g10%
- Calcium 78 mg
- Iron 1 mg
* Percent Daily Values are based on a 2,000 calorie diet. Your daily value may be higher or lower depending on your calorie needs.
Note
- No fresh cherries on hand? Frozen cherries work just as well for the filling — just add them straight from the freezer, no need to thaw.
- Traditional Black Forest recipes often add Kirsch (a German cherry brandy) to the filling, but this recipe leaves it out and uses a touch of almond extract instead for a similar warm, cherry-forward note.
- Storage: Keep leftover cupcakes covered in the fridge for up to 2 days, since the whipped cream and cherry filling are perishable. Keep assembled cupcakes refrigerated and don't leave them at room temperature for more than about 2 hours (or 1 hour if the room is above 90°F/32°C). Let them sit out for about 20 minutes before serving so the cupcake isn't cold and dense.
- Freezing: The unfilled, undecorated cupcakes freeze well for up to 2 months in an airtight container. The cherry filling also freezes well on its own. Thaw both in the fridge overnight, then make the whipped cream fresh and assemble the same day you plan to serve them, since whipped cream doesn't freeze or thaw well.
- My kids like to help spoon the cherry filling into the cored center just expect a few extra "taste tests" along the way.